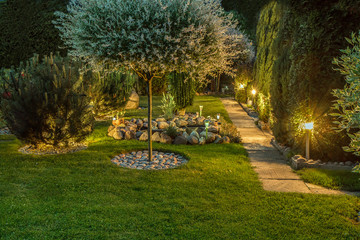
The Importance of Landscape Lighting Repair
Landscape lighting is a beautiful, functional addition to any home. But like anything that involves electrical components, these systems must be properly maintained and cared for to function correctly.
Fortunately, many of the most common landscape lighting repairs can be accomplished by the homeowner without the help of an electrician. Click Here to learn more.
Fixtures in a landscape lighting system are exposed to outdoor elements like dirt, water & insects. Over time, this can lead to corrosion & stripped wiring. A professional can rewire or replace damaged components to keep your lights working as they should.
The most common problem with landscape lighting is that the bulbs have burned out. While this may seem simple enough, it is often the sign of a bigger issue. This could mean that the fixture itself is faulty or that there is a problem with the wires.
If a light isn’t turning on or flickering when it is turned on, it can be difficult to diagnose the cause. However, a light that is arcing or making a buzzing sound when turned on is likely a serious issue and requires attention from a qualified electrician.
Leaking fixtures are another serious problem that needs to be addressed quickly. This is not only an indication that the fixtures are faulty but also that they aren’t designed to withstand harsh weather conditions.
A lighting professional can help you choose new fixtures that are better suited for your climate & will be more resistant to damage. In addition to providing improved functionality, this can also boost your home’s resale value.
Many people are tempted to try and fix their landscape lighting by themselves, especially if it isn’t a complicated problem. However, it is important to remember that these are electrical fixtures and if you don’t know what you are doing you could end up creating a more significant problem.
In addition to ensuring that your landscape lighting is functioning properly, it is important to regularly clean the lenses. These can get dirty with melting snow, rain & mineral deposits. You can use a non-abrasive cloth or even a CLR type of cleaner to clean the lenses. This will improve illumination, reduce the appearance of a dimmer light and prolong the life of the fixtures. You should also clear away any mulch that is burying or covering the fixture as well as trimming any plants that are growing too close.
Wiring
Landscape lighting is a beautiful addition to any home. However, like anything else, it requires proper maintenance and care to perform at its best. If you have a landscape lighting system, it’s important to keep an eye on your wiring and replace faulty parts before they break down.
In most cases, when a lighting system doesn’t work it is because of a bad wire connection. This can be caused by substandard materials used for the installation, use of the wrong outdoor connection system or a cut wire. It can also be caused by moisture damage within the system or by places where the wire is stretched over roots and rocks.
Often, when a light doesn’t work, the first thing homeowners think is that it is a burned out bulb. While bulbs last a long time, it is more likely that the problem is caused by a wire connection or moisture. The good news is that most landscape lighting wires are buried to protect them from the elements and garden wildlife that may gnaw on them. This makes finding the problem quite easy.
If you suspect that a section of the lighting wire is broken, start by turning off the transformer. Most of these units will have a power switch to turn it off or you can unplug it. Once the power is off, locate the lighting fixture that is not working and carefully dig around it with a garden shovel to find where the wire is located underground.
Once you find the broken section of the wire, cut it out using a pair of wire cutters or pliers and remove about 1/2 inch of the wire insulation on both ends with wire strippers. Next, link the clean and dry wires together with a wire connector. Then encase it with silicon caulking to keep the connections dry.
After the repair, it is a good idea to test each light with a digital voltage meter (about $25 at Radio Shack). A voltmeter will allow you to make minor voltage adjustments and will help you determine if a lighting fixture needs a new bulb or just a clean wire connection. Also, don’t forget to clean off corrosion on the bulb fixture contacts and spray them with contact cleaner before reinstalling them.
Timer
Landscape lighting systems are a great way to add light and style to your home or commercial property. These systems can increase security, improve curb appeal, and make your outdoor areas functional at night. However, these systems require regular maintenance to keep them working properly. Some common signs that your landscape lights are in need of repair include flickering bulbs, inconsistent illumination, exposed wiring, or failure to turn on at scheduled times. These problems should be addressed by a professional landscape lighting repair company as soon as possible to ensure the safety and longevity of your lights.
A properly functioning timer is critical to ensuring that your landscape lights are activated at dusk and turned off at dawn. If your timer is not turning on your lights, it may be due to a bad connection or incorrect settings. If this is the case, it’s important to find the timer and unplug it. Once the timer is unplugged, you can start by locating the tabs that control the schedule. These will either be red and green clips or push buttons. A green clip indicates when the lights will turn on and a red one will indicate when they will turn off. Using the arrows on the timer, you can change these tabs to the desired timeframe and then plug the timer back in.
You can also reset your low voltage landscape lighting timer by using the buttons on its face. These buttons will usually have a “ON/OFF” setting, as well as an “AUTO” and an “INITIALIZING” button. To set the ON/OFF setting, press and hold the “ON/OFF” button until the display shows a “0”. Then, press the corresponding button for the day of the week you want the lights to turn on. You can repeat this process to set the ON/OFF times for each of the days in your week.
If your timer has a digital display, you can simply use the clock button to set the date and location. Once you have these settings, you can begin programming your ON/OFF times. Many people choose to power their lights on from dusk to midnight, while others prefer to run them for only a few hours in the evening.
Transformer
As a power center for a landscape lighting system, the transformer delivers a safe voltage to light fixtures. However, the transformer is also susceptible to problems, often due to loose connections within it. As a result, the lights may fail to work properly. In the worst cases, electricity can jump across the loose wire connections and generate heat that melts the connection points or in extreme cases, even cause fires. As a result, it is important to check the connections regularly to ensure that they are tight and secure.
The transformer should be located in a protected location away from moisture sources. In addition, all wire connections should be watertight, which can be achieved with the use of waterproof splice connectors designed specifically for low-voltage underground splicing. Using these waterproof connectors will help prevent electrical shorts from occurring within your landscape lighting system.
Another problem that can affect the operation of a light fixture is a dirty bulb socket. This can be caused by corrosion on the bulb socket contacts or from a buildup of dirt and debris on the fixture itself. To clean the bulb socket, you can try rubbing it with a dry cloth or some mineral spirits. For a more in-depth cleaning, you can use an emery board or some sandpaper to remove any dirt and corrosion on the bulb contact. You should then spray the bulb socket with some contact cleaner to keep it clean for a long time.
If a light fixture doesn’t work, you can try replacing the bulb. If the new bulb still doesn’t work, it is likely that the socket is bad and needs to be replaced. To test the socket, you can use a digital voltage meter to see if it is receiving any power. The meter will show whether or not it is getting 10.5 to 12 volts, which is what it needs to operate.
Having an expert landscape lighting installation done by a professional is the best way to reduce the need for frequent and costly repairs. With high-quality products, optimal installation methods and proper maintenance, landscape lighting can provide years of enjoyment without needing repairs.
